Americana SVG Cut Files for Silhouette and Cricut
This post contains some affiliate links for your convenience. Click here to read my full disclosure policy.
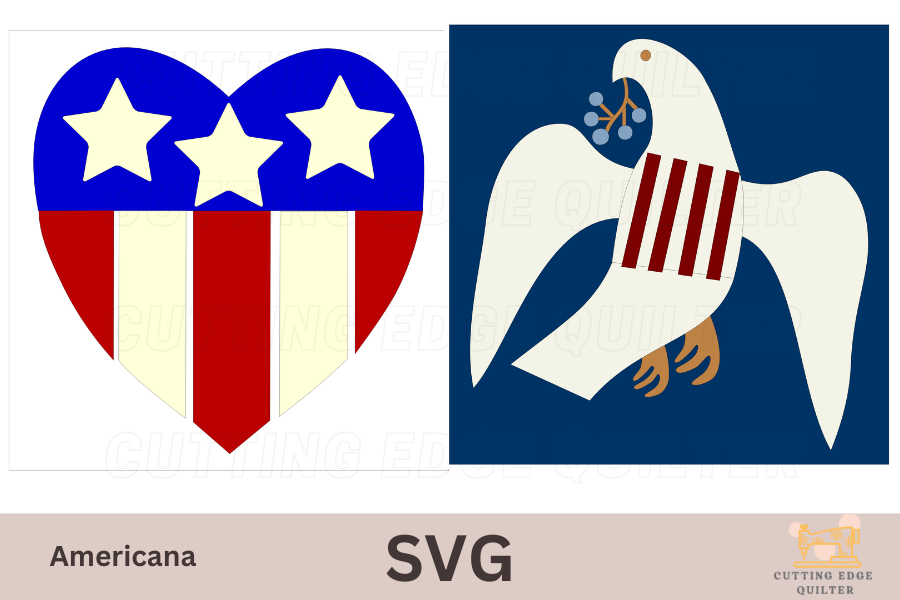
Happy Independence Day!! Cut out some fabric with me to make inexpensive and really easy vintage Americana pillowcases. Check out my previous post using my new Silhouette Cutting machine here. Now I want to try cutting felt.

Since receiving the new Silhouette Cameo 4 Pro, I’ve been really wanting to try to cut wool for appliqué on a quilt. The price of wool is pretty expensive so I’m testing the cuts first on felt that was purchased at Joann’s.
Ready to cut your fabric? This post contains some affiliate links for your convenience! Read my full disclosure policy.
Would you rather opt for a video tutorial instead of step-by-step instructions? We’ve got you covered with a comprehensive video tutorial that guides you through the process of making Vintage Americana Pillowcases.
How to make a pillowcase with Vintage Americana SVG cut files ~ Step by Step
Materials Needed
Step by Step Instructions
Step 1: Cut a square of fabric approximately 2 inches larger than the pillow form. If you watched my Youtube video, I cut the first pillowcase to the exact dimension of my pillow form which was 12″ x 12″ but after the seams were completed, the finished pillowcase was around 10″ x 10″ so it was a very tight fit. The next pillow was made 14″ x 14″ to fit the form and it was a perfect fit.

Step 2: Getting the felt ready to cut is the next step. In order to secure it to the pillowcase before sewing, I used Sewable Heat N Bond lite weight. You can use any kind that you have available, that is just what I had on hand and it worked.

Step 3: Next, it’s time to cut the Americana SVG cut files design in the felt using the Silhouette Cameo cutting machine. I have cut them out using scissors and let me tell you that using the cutting machine is so much easier!! The cuts are so precise and definitely worth using the machine.

Step 4: To sew down the felt, I used a satin stitch in places where there was a gap between the felt and then a blanket stitch on the outside. To sew the tiny pieces on the bird, I used a straight stitch and just made a little circle on the inside of the felt pieces.

Step 5: Now that everything is stitched down on the front of the pillowcase, it’s time to make the back of the pillowcase. I’m making an envelope style so it has a place in the back where the fabric is overlapping another piece of fabric to insert the pillow form.
To make the back, cut a piece of fabric the width of the material that you used for the front but cut the length 5 inches longer.
Cut the piece exactly in half and then hem both halves by folding over 1/4 inch, iron, folding another 1/4 inch, iron, then sew it with a straight stitch. Do the same process with the other piece of fabric.
Then lay the front piece right side down, and the back pieces on top of it right side up.

Step 6: Sew around the edges 1/4 of an inch.
Then to make a french seam, turn it inside out and then sew another 1/4 of inch around the edges careful that you sew the first seams completely inside of the second seams.

Now stuff the form into the pillowcase and you’re done!! That was so quick and so easy that it can be made in about 30 minutes total!

How to make a Vintage Americana Pillowcases Instruction Video
You can find more video tutorials on our Youtube Channel
Did you make this craft?
We would love to see what you have created so mention us @cuttingedgequilter or tag us using #cuttingedgequilter so we can see your creations!
